The game content for GTA IV: Special Edition is identical to the standard edition offering. Therefore this review is identical, save for details on the contents included in the Special Edition. You can find those impressions on the final page of this review.
Criminals are an ugly, cowardly lot more worthy of pity and disdain than admiration. This is what you'll learn playing through the single-player campaign in Rockstar's Grand Theft Auto IV. The series cheered (and criticized) for glorifying violence has taken an unexpected turn: it's gone legit. Oh sure, you'll still blow up cop cars, run down innocent civilians, bang hookers, assist drug dealers and lowlifes and do many, many other bad deeds, but at a cost to main character Niko Bellic's very soul. GTA IV gives us characters and a world with a level of depth previously unseen in gaming and elevates its story from a mere shoot-em-up to an Oscar-caliber drama. Every facet of Rockstar's new masterpiece is worthy of applause. Without question, Grand Theft Auto IV is the best game since Legend of Zelda: Ocarina of Time.
You play as Niko Bellic, an Eastern European attempting to escape his past and the horrors of the Bosnian war. He arrives in Liberty City to experience the American dream, only to discover his cousin, Roman, may have fibbed a bit in his tales of success. Starting from nothing, Niko makes a living as a killer and enforcer, a bad-ass foreigner who appears to have no morals. The longer we stay with Niko, the more we see that there is a broken human being inside, one who would give anything to escape the person he once was.
Don't worry, GTA's famed over-the-top action and tongue-in-cheek humor are intact, but there is a new level of sophistication in the characters and the game world that raises the story above the norm. As Niko becomes mired in the death throes of American organized crime, he begins to become more self-aware. Niko's struggles with his ruthless nature never inhibit the gameplay, but instead enhance the emotional gravity of a brilliant storyline. The more absurd the action becomes, the greater we feel the very real pathos of Niko Bellic.
Much of the credit goes to the artists at Rockstar North who created as believable a city as possible. Liberty City is inspired by New York, but not beholden to it. While there are many parallels, Liberty exists in its own universe and rightfully so. Many open-world games have cities that feel as if they existed only from the moment you first turned on your console, but Liberty City looks lived in. It's an old city and each block has its own vibe and its own history.
Drive around Liberty City and you'll be able to identify each individual block. Though Liberty is filled with brownstones and a myriad of similar brick buildings, you can tell one from the other, just as you can in New York. Go to an affluent neighborhood and the street is likely to be newly paved, the pedestrians better dressed, the cops more plentiful. But head to Dukes or Bohan and you'll find streets nearly stripped of asphalt, homeless people wandering about aimlessly and criminals preying on the weak.
Niko is fresh off the boat.
Watch the people and you'll witness some amazing things. At one point, I saw a woman stopped at a light, looking in the rearview mirror right before she was rear-ended by a man ogling a girl on the street. The man got out of his car and went to the woman, checking to see if she was okay. This had nothing to do with Niko or a single action I took. These were the citizens of Liberty City going about their day. And it was just one moment in a day full of incidents.
Hang in one area of the city long enough and you'll see how traffic and pedestrian flow changes as the day progresses. When it rains, people bring out umbrellas or shield themselves with a newspaper and run for an awning. Cops chase petty thieves unaware that walking down the street is Niko Bellic, cold-blooded killer. There's a perfect balance of mumbling doomsayers to remind you that the reason this city never sleeps is because it's full of nut jobs. People go about their day, only altering course when Niko inserts himself into their lives with his crappy driving or excellent marksmanship.
Knowing this will help you figure out which type of base/defense you should create.
An enemy with only general buildings on one side is very vulnerable. Putting the same types of towers together is not a good idea. If they do this they will be very easy to destroy.
Example: If an enemy uses flying monsters to attack, Rocket D.A.V.E.s in your bunkers are good for defense.
It is important to know which buildings are important and which are less important. It is highly recommended that you place your Town Hall dead center in your yard, using the Yard Planner for accuracy. You may also place your Champion Cage in the center for maximum champion range (only recommended for high level champions).
These are the least important buildings since looters do not get any resources from them and they have low repair time. A good way to use them is by building an NEC (never ending chain). This is basically a ring around your base, to distract monsters that have their favorite targets set at "anything" (D.A.V.E., Pokey, etc.).
Your primary method of defending your yard. Without them any base can be farmed easily, even with the weakest monsters. It is important to upgrade these buildings as high as possible for maximum defense and range.
These are the most important buildings next to your Town Hall. When an enemy attacks, it is usually for the purpose of looting resources from you. It is important to not place these where they can be easily reached and destroyed, particularly your Storage Silos. (You will lose 5% of TOTAL resources for each Silo that's destroyed.)
Your most important building. It stores most of the resources in your yard (8%). Protect it at all costs! You will lose 8% of TOTAL resources if it's destroyed.
(MUST READ) It is important to make your base as symmetrical as possible to prevent or lessen the creation of weak spots, though it can make your base more predictable.
Checkpoint 1: Make sure your THDT/SDT works by posting an image of it. You can check in the BYM forums. If you do not have an account, you can make one or ask a friend that has one to post it for you.
For the guide above skip to the Yard Planner guides section. I know it is not made for NGYP, so skip steps that don't apply.
Tips on THDT/SDT
-make the pathing as wide as 2 blocks, so dave fits in it instead of destroying blocks for it's path. Minimum should be at least 1.5 blocks wide.
-make the pathing non-rocket dave prone, so the dave will have to step through some traps before shooting it's rockets
-make the trap placement make the attacker not easily notice where the traps are placed
-make it as long as possible, but not too long
-try to make the THDT/SDT as small as possible, for more space for other buildings, unless you have a fairly large amount of yardage
-blocks should be at least steel level to function. The higher the block level, the better.
-try to make it as complex as possible, so it will be hard to copy without the yard planner images
READ: If they say it should work, move your buildings out of the way and test in-game. Freeze your champion and make sure there are no towers ranged on the Death Trap except Aerial Defense Towers since flying monsters do not path at all (only when your luring ground monsters of course). Make sure your Traps are put away, so monsters don't die while stepping on them. Then refresh before it saves, so there is no damage.
It is important to place defenses in the right areas. Placement depends on your level and base design.
This is a table that lists all defense building except the Champion Chamber, since it is considered a defense but it does not act as one.
Make sure defenses are evened out and are as symmetrical as possible.
Name
Description + Placement
Air
Ground
Champion Cage
This building can only be destroyed by splash damge. Make sure it isn't baitable, meaning the champion can't be killed easily by just sending monsters from the edge. This defense has the highest range in the game (30 blocks). Since the Champion Cage cannot be catapulted it dosen't matter if you put resources around it or not, and it would be hard because of its size. You can place this in the center for maximum protection, but this is not recommended for low level champs. This Cage can also be used as a big block since it cannot be damaged.
This is an important building for defense against flying monsters. Without them your base can be easily destroyed by flying monsters. Place them between or behind Silos so nobody has the urge to catapult them because they would destroy Silos with the ADTs. To prevent your pathing from messing up due to the ADTs place blocks around the ADTs.
Yes
No
Tesla Tower
This is a fast-attacking but slow-reload building with high voltage. Place them between or behind Harvesters.
Yes
Yes
Laser Tower
This is an excellent low range defense for weak monsters, but it may not be as effective for stronger monsters. Place them between or behind Harvesters.
No
Yes
Railgun
The Railgun shoots an infinite line of power. The line damages monsters outside of Railgun's range but it only reacts to monsters in its range. Use this for your death trap, so monsters get damaged while pathing. Place these between or behind harvesters.
No
Yes
Monster Bunker
The Bunker houses monsters that fight to the death trying to kill your enemies. Place them as close as possible to your Town Hall for maximum protection, with Harvesters in front of them. The monsters you put in here depends on your base, but here are some recommended monsters for all bases:
Rocket D.A.V.E.s., Airburst Eye-ras, Whirlwind Banditos and Crabatrons. If you're a low level and do not have any of these, just use the monsters you have.
Note: If a Bunker is destroyed by a Catapult, all the monsters inside will be killed.
Depends on monster and ability.
Yes
Sniper Tower
Sniper Tower is best used for long range support unless you don't have any Teslas, Railguns, or Bunkers since it wouldn't be as strong alone. Place these near Teslas and Lasers so they support them. It doesn't matter if you have Harvesters near them since it is unlikely for anyone to aim just for these.
Yes
Yes
Cannon Tower
Cannon Tower is a fast attacking support tower that can be very useful for weak monsters, but just like Laser Tower it is not that useful for stronger monsters, since they damage an area of monsters. Place these near Teslas and Lasers so they support them. It dosen't matter if you have Harvesters near them since it is unlikely that anyone would aim just for these.
No
Yes
You can also make a ring with Sniper Towers and Cannon Towers to delay PPX.
Harvesters: Buildings that harvest resources (Pebble Shiner, Putty Squisher, Twig Snapper, and Goo Factory) Place these in front of defenses to make people hit/destroy harvesters with the defenses. Make sure you even them out. Do not place harvesters in front of Snipers and Cannons since nobody smart would aim to catapult just them.Silo
An NEC (Never Ending Chain) is circular path made with general buildings like monster locker, general store, wild monster baiter etc. An NEC makes attacking monsters go around in circles, targeting the general buildings first. Make sure they are evenly spread out.
Have some blocks and traps left over? You should, because if you don't, you used too many blocks in your Death Trap. Use leftover blocks for pathing and as bait for Eye-ras.
Pathing
You want attacking monsters to move along and inside a path instead of going directly to their next target. Pathing should be simple and short. Here is one example:
Eye-ra bait
These are single blocks placed outside your walls to bait Eye-ras, preventing them from smashing through your walls and leaving an opening for other monsters to pour through. Eye-ras do splash damage, so place the blocks as far away as possible from any building, especially Monster Bunkers. Spread these out evenly.
Don't expect to make an epic base on your first attempt, and remember that there is no such thing as an ultimate base (no base is invulnerable to all attacks).
Note: This guide does cover a lot of stuff, but not everything.
Some other guides:
After you read some guides, and when your done making your base...post it in Stomp the Yard section in the BYM forums to get it rated:
After you get it rated, test it with the Wild Monster Baiter to see how well it works. You can also ask other players to test for better testing.
Warning: Facebook bans multiple account users, so it's highly recommended not to use multiple accounts.
This is just the start of making epic bases. It's recommended to make newer designs as your level increases/game evolves to make the strongest base possible.
Try to make a strong base, rather than a base that looks cool. (Reasons: Pathings can be ruined, and it can be a waste of blocks)
No base is invincible. Any base can be destroyed with time and skill.
NEVER make a box yard. It's one of the worst yards in the game.
Try to waste the attacker's time as much as possible. One way is a NEC (as said in #8).
Try to make defenses cover as many buildings as possible.
Don't put all the same resources together. So if you are attacked you don't lose all that one resource.
World Map 3(aka Map Room V3) is a relatively new (officialy released on 6th of november 2012) Map on Backyard Monsters. It presents new features and is alot different than other two World Maps, World Map 1 and World Map 2.
Joining World Map 3Edit
A player is able to join this map room at any time. However, once a player has joined this map room, he/she cannot go back to other kinds of map rooms. Also, when players decide to join the new map room, they will lose all Outposts (and Empire Points) in the old World Map, but will also take all the resources with them.
Additionaly to that, when players move to this map room, they can take with them any monsters in their Monster Housings, but not the monsters in their Monster Bunkers (those monsters will die during transfer so it is better to juice them). This is because in World Map 3, Monster Bunkers share capacity with Monster Housings which have bigger capacity than in world map 1 and 2. Monster bunkers also have their capacity halved.
Special featuresEdit
New features Map Room 3 brings:
Outpost Defenders: six Outpost Defenders surround every Main Yard, Resource Outposts and Strongholds. You can take over an Outpost Defender by attacking and destroying it, there are no take over costs. Conquer Outpost Defenders surrounding Strongholds & Resource Outposts to lower their defenses and secure your hold on them.
Strongholds: boost the defenses of your Outposts and Main Yard within a specific range. Increase your attacking strength within that specific range. Different Levels represent farther ranges of strength and stronger health. You can Fling within your Stronghold's range without paying a Battle Initiation Cost. Overlapping Strongholds stack the Stronghold defensive and offensive buffs.
Resource Outposts: These are the only Outposts that provide resources. They expend your resource capacity and automatically banks outpost resources. They increase resource capacity in Main Yard based on their level. Resource outposts will also increase your free attack range.
Monsters you fling into battle from your main yard don't die, but instead return to your yard to be "healed" (using Goo), however, only four monsters can heal at the same time. Also, the monster hatching cost and hatching time are tripled.
Wild Monster Tribe: Wild Monster outposts will be removed permanently once destroyed.
Battle Initiation cost: it is a price (in resources) you have to pay to attack another occupied Resource Outpost, Outpost Defender or Stronghold that is out of your range.
Flinger functionality works differently in the New World Map. Attacks have a limit on the amount of Monsters that can be flung in to a battle. A player can fling in monsters multiple times, but your Flinger capacity will decrease after each attack wave and once it hits 100% no additional monsters can be added. The amount you can fling also depends on the level of your Flinger; the higher the level, the more monsters you can fling. Champion monsters do not take any space in the flinger; in other words, if your flinger capacity is full, you may still send in your champion(s).
Changes -Monsters will be healed and will not die. -There will be no more Take-Over Costs but there will be Battle Initiation Cost when attacking outside flinger range. -MR3 will be full screen and a little bit faster. -Not all Outposts will produce resources. -There will be 3 types of Outposts. Stronholds, Resource Outposts and Defender Cells -Outposts that produce Resources will be called Resource Outposts. -Outposts that increases your defenses will be called Strongholds. -There will be defender cells which surrounds your Main Yard and outposts like Strongholds and Resource Producing Outposts for defense bonuses. -Capturing the hexes around your outposts will give a defense bonus. -Players in MR1 will be automatically moved to MR3. -Players in MR2 will be able to opt-out. (They can decide not to leave MR2) -It will be a one way trip. You can't go back to MR2 if you already moved to MR3. -You can attack any part of the map. (Assuming you can afford the Battle Initiation Cost) -There will a cap on how many outposts you can capture. (It will be high) -MR3 will be a free upgrade. -Housing Storage will be adjusted upon released of MR3
Housing Storage
KIXEYE will no longer be planning on adding more housing storage per outpost you take-over. Here's V2's explanation(quoted):
With Persistent Monsters that heal after battle, increasing Housing based on Outposts could get tricky. If an Outpost was taken by another player, which Monsters in the Housing would the game remove?
But Don't worry because....
However, in the New World Map Players will be able to have significantly more Monsters in their Main Yards than they currently have in MR1 & MR2.
So that explains the Housing Storage change. UPDATE: Monster Housings will now be upgrade-able to level 10. Bunkers Nerfed and will only hold half of the original amount before the update. Bunker space and housing space will also be combined.
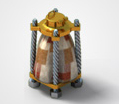
Defender Cells They are the cells that surrounds mainyards, strongholds and resource producers. We assume that Defender cells will give defense bonus to the outposts or mainyard they are beside with or surrounding. Defender Cells have an outpost defender on them. Here's a pick of an Outpost Defender. More detailshere.
Battle Initiation Cost Since you're able to attack anywhere in the map and will not pay to take-over something. You must pay resources before you attack a base. And this payment is called the Battle Initiation Cost. You will only pay B.I.C if the cell or hex you will be attacking is outside your flinger range. Flinger There will now have a limit on how many monsters you can fling in a single attack. You can also upgrade your Flinger to level 5.
MR3 Look And Feel It will look, A lot like this. Here's the full analysis in this post for the overall look of the map. It looks pretty much like the War Commander map. The blue range is the flinger range which will allow you to attack targets for free.
Click To Enlarge
The Outpost Limit
The outpost limit for MR3 is still unknown. But I'm pretty sure it won't be as high as 3,500 like the MR2 outpost limit. UPDATE: There is no limit in the outpost you can own.
The Stronghold
It's just an awesome building that reflects the graphics on that thing. It looks like this. A more in-depth about the stronghold building in here. The Stronghold building present in outposts are also called Strongholds. Strongholds give defense bonus to hexes you own that is within its range.
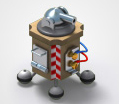
Resource Producers
This will be in the resource producing outpost. Here's a separate post about it here. It basically produces all resources. And unlike in MR2. This is the only building that will produce resources other than MY resourcegatherers. Here's an image of it.
Conclusion
Long post but worth it. If you have any questions, don't hesitate to ask on our fb page or on the comments below. I'll update the outpost if I find more things worth mentioning. And as always, Nothing is set in stone so expect some more changes when MR3 arrives since KIXEYE likes making last second changes. All old post about MR3 changes will redirect here in this post.


 Edit
Edit
 Added by
 Added by
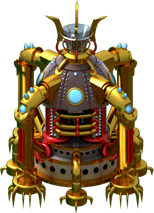


 Added by


